2FA
This information relates to 2FA on your website.
Hackers rarely need to hack a website when one of the main vulnerabilities lies in weak passwords, but you can help protect your website.
2FA adds an extra layer of protection. After you use your login details as normal, you use a second form of verification (such as a code sent to an authentication app on your phone, or an email with a link).
This helps safeguard sensitive data and prevents unauthorised access, even if an attacker manages to obtain a password. Given the rise in cyber threats and data breaches, 2FA can greatly reduce the risk of people gaining control over your website.
2FA is applied to each person with an admin-type login to the site
and is individual to them (you do not centralise or share it).
Why you should use it
Key Benefits of Using 2FA:
- Stronger security: Protects against password-related attacks such as phishing or brute-force attempts.
- Regulatory compliance: Helps meet requirements for data protection standards and industry regulations.
- Access control: Reduces the risk of unauthorised access to admin panels, user accounts, and sensitive data.
- The cost of 2FA is minimal compared with
- Financial Impact
- Brand Reputation
- Customer Trust
- Operational Disruption
- Insurance Claims
- The ‘downtime’ of your business
Find out about the cost of 2FA.
First time using an authenticator?
If you’ve never used an authenticator, it’s worth knowing that it’s linked to your individual login details. You are not reliant on one person in your team.
- Authenticators create new 6-digit codes every 30 seconds
- You use the 6-digit code from the authenticator to complete the login to the website
- If the time for the 6-digit code is running out when you log in, wait a few seconds for a new one. Using a code that’s about to expire might not allow the website to confirm it in time, and you’ll need to repeat the process.
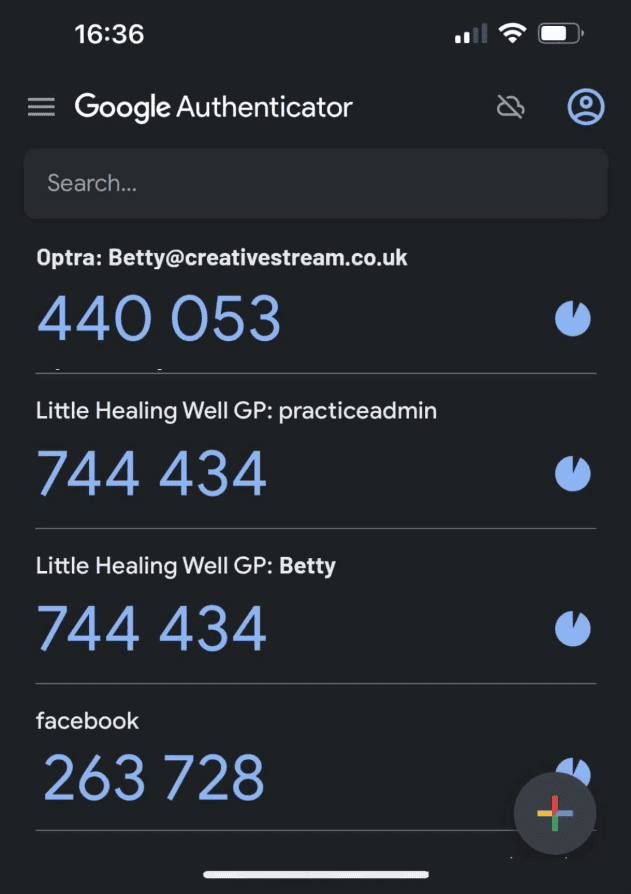
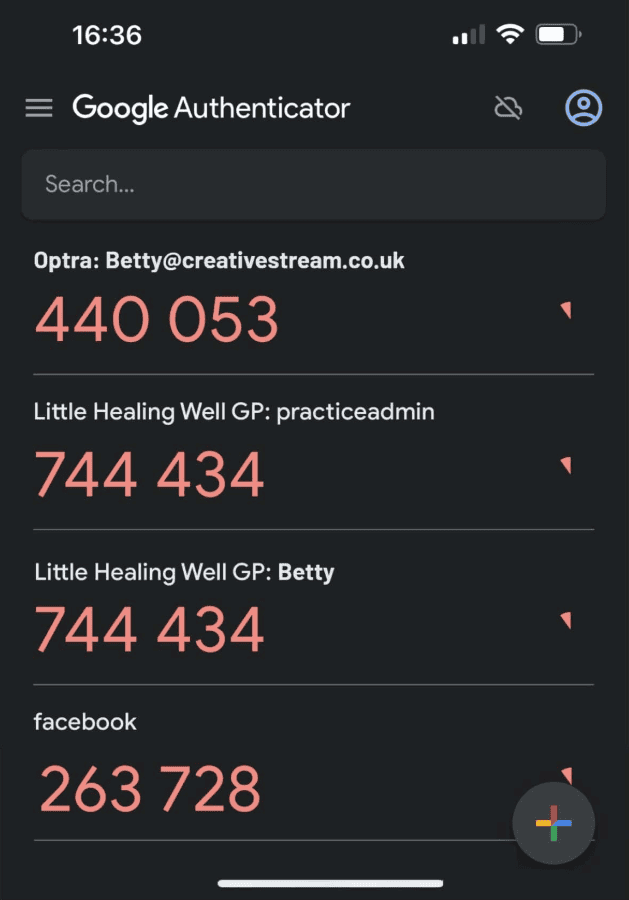
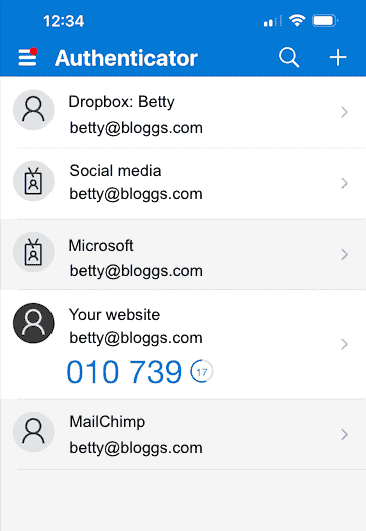
Examples
Left: Google – new blue codes for several websites, and the circle at the end is almost full.
Centre: the codes turn pink and flash, and the circles diminish to warn you the code’s duration is finishing.
Right: Microsoft – a circle with a countdown inside it shows the remaining duration (no colour change or flashing).
Clicking on the images below will open them in a new tab and they will be larger so you can see them easily
Google Authenticator
We can’t provide instructions for someone else’s product, but this video might help you:
25.02.25 Advice from Google on how to:
- Use the authenticator without a Google Account
- Keep your Google Authenticator codes synchronised across all your devices
- Transfer your Google Authenticator codes
- Use Authenticator with multiple Google Accounts
- Edit your Google Authenticator codes
- Organise your Google Authenticator codes
- Delete your Google Authenticator codes
- FAQs, such as lost/stolen devices, best practices, etc
Microsoft Authenticator
We can’t provide instructions for someone else’s product, but this video might help you:
25.02.25 Advice from Microsoft on:
What you must do before training
Before the training session, you must each download an authenticator to your mobile phone. Google and Microsoft have free versions, and videos and links to instructions are on this page.
You will need the authenticator on your mobile phone to:
- Complete the setup at the training session
- Log in to the site every time
Link the authenticator to your account
Linking the authenticator to your account is usually a one-off event.
- Pay us to set up the functionality (find out about the cost)
- Download an authenticator app to your phone. Advice is on this page.
- Log in to your site with your email/username and password.
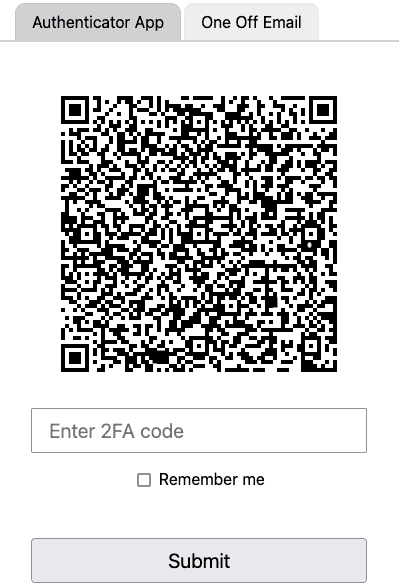
- A QR code will appear on the website (image 1)
- Using your authenticator, scan the QR code.
- In your authenticator, you will see details about your website and a 6-digit code.
Note: A new code is generated in your authenticator app approximately every 30 seconds, and you do not have to use the first code you see if the timespan for the code is nearly finished. - Type the 6-digit code into the website where it says “Enter 2FA code” (image 1)
- If it’s correct, you complete the login process on your website, and the actions above will link the Google/Microsoft Authenticator to your login details.
- Continued…
Clicking on the images below will open them in a new tab and they will be larger
You should only have to scan the QR code once. From then on, when you log in to the website, you’ll enter your username/email address and password as normal, then enter a 6-digit code from the authenticator to finalise the process.
Set up with email
Please weigh up the pros and cons of using email. If your laptop is stolen, access to the website and authentication will likely be on one device. To enable email authentication on your website, please talk to us.
Logging in using email will follow the same process every time.
The screenshots and email below are unique to this client, and the wording, colours, and style may differ on your website.
- Pay us to set up the functionality (find out about the cost)
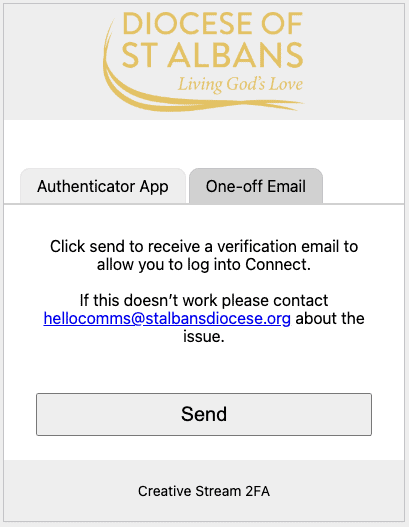
- Log in to your site as normal (image 1)
- If you see a QR code, click the tab in the top right ‘One-off email” (image 2).
- Click the button to send/submit once (image 2).
- The message changes to “Hi, we have sent you a verification email, if you do not receive it please click here to try again.” (image 3)
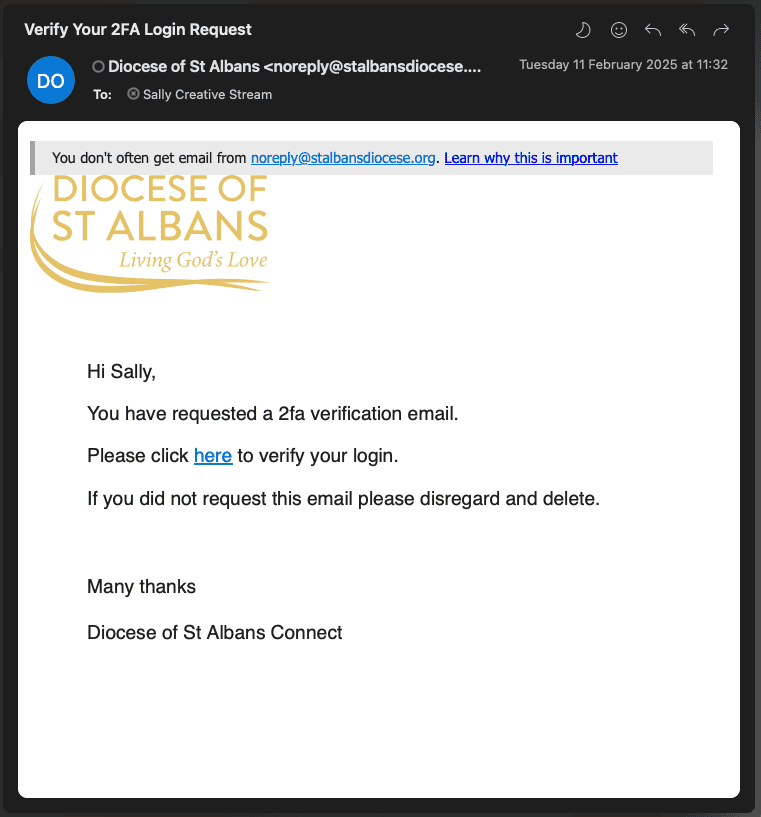
- An email is sent to your email account.
- Check your inbox/spam folders – remember to synch/refresh your email as it can take a minute or two to arrive.
- The email will have a link in it. Click the link and you will be taken to the website (image 4)
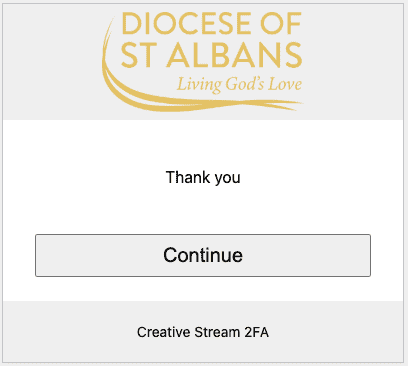
- Click the button that says ‘Continue’ (image 5)
- The login process on your website is complete. If you don’t see the back end of your site, look for the W in a circle in the top left of the screen, and click it to go to your WordPress dashboard.
Clicking on the images below will open them in a new tab and they will be larger so you can see them easily


What is ‘Remember Me’?
‘Remember Me’ works by using a session cookie.
It should remember you for two weeks, saving you from logging in repeatedly. It lasts for a single session that starts when you log into the website and ends when you log out, close the browser tab, or close the browser.
The following will cause the end of the session:
- The user closes the browser
- The user logs out of the program
- The user turns off their device
- The device dies through lack of power (e.g. the laptop isn’t charged)
If you have to log in each time with 2FA regardless of clicking ‘Remember Me’, you should check that the cookie choices you have enabled on your browser are compatible.
Locked out?
The screenshots and email below are unique to this client, and the wording, colours, and style may differ on your website.
If you make 3 incorrect attempts:
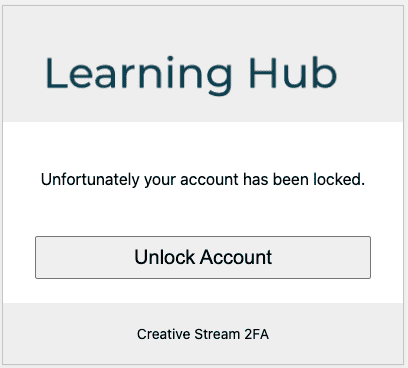
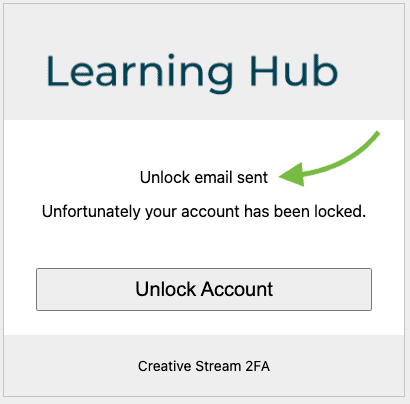
1. On the 3rd incorrect attempt to log in, you will see a box telling you the account is locked.
2. The box has a button that says ‘Unlock Account’. Please click it only once (image 1).
3. The box confirms this action – it will change to ‘Unlock email sent’ (image 2)
Continued…
Clicking on the images below will open them in a new tab and they will be larger so you can see them easily
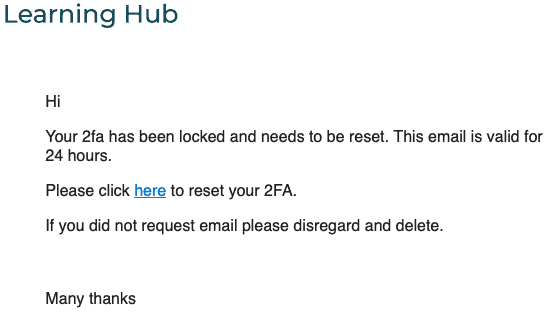
4. The system sends an email to the email address linked to that account. It can take a minute. Ensure you refresh/sync the device that holds your emails to ensure it’s showing you the latest ones, and check your spam folder.
5. Click the link in the email (image 3, above) to be taken back to the site where you can scan a new QR code to set up a new 2FA.
6. The link in the email is valid for 24 hours.
Google Authenticator: At the time of originally writing this, the latest link from the QR code will appear at the bottom of the list on the authenticator app on your mobile phone. Make sure you remove the original link in your authenticator (otherwise, you will have two links to the website, and only one of them will work).
Microsoft Authenticator: The authenticator app typically overwrites the old link with the new one.
Troubleshooting
We can’t provide instructions for someone else’s product, but these links should help you:
- Advice for troubleshooting the Microsoft Authenticator
- Advice for troubleshooting the Google Authenticator
The only queries we encounter are regarding the ‘Remember Me’ function to stay logged in, and advice is on this page.
2FA and MFA – what’s the difference
2FA means Two-factor authentication
It’s a security system that requires two separate, distinct forms of identification to access something. The first is typically a password or code, and the second is commonly a message sent to your smartphone, a link in an email, a retina scan, facial recognition, fingerprints, etc. Sometimes, it’s called ‘Two-step verification’
MFA stands for Multi-Factor Authentication. 2FA requires users to present two types of authentication, while MFA requires users to present at least two, if not more types of authentication.
Cost
Details
- £25 per month (£30 inc. VAT) per website, or
- £250 per year (£300 inc. VAT) per website
- Covers all your admins/editors
- The fee is payable in advance
- Details correct May 2025
- Adding 2FA will affect all admin-type users of the site. Once we trigger the process, admin-type users of the site will have to use 2FA to log in again.
Investing in 2FA is a small price to pay compared to the potential long-term costs of reputational damage, data breaches, and customer trust loss. Without 2FA, your site becomes more vulnerable to cyberattacks, which could lead to unauthorised access to sensitive information. This not only jeopardises your users’ data but can also result in significant financial losses and a tarnished reputation that may take years to rebuild.
By implementing 2FA, you’re taking a proactive step to protect both your users and your brand, ensuring a higher level of security and demonstrating your commitment to safeguarding personal information. In the end, the cost of preventing a breach far outweighs the consequences of dealing with its aftermath.
Last updated: 13.06.25
